Creating Hollow Composite Parts Using Silicone 3D Printing
Naturally audacious, we are constantly looking for ways to optimize each of our projects with 3D printing. It is in this quest for innovation that our composite materials engineer, Enzo Lobry, designed a solution to address a common problem in the field of composite materials: the difficulty of creating hollow parts and compacting the fibers against the walls of molds. Essential in many industries, hollow parts often represent technical challenges, due to the complexity of placing composites into the mold and ensuring good compaction. Typically, this process is carried out using a vacuum bag that is cut and assembled by an operator. This process is time-consuming and delicate, requiring expertise and numerous iterations. A process that is both time-consuming, expensive, and not very responsible (single-use bags). Enzo thus tackled the issue, how to make a hollow composite part using a 3D printed and reusable silicone bladder? In our case, Enzo started by designing a carbon fiber handlebar stem, thanks to the creation of a custom-designed silicone bladder. The concept is simple: once the composites are placed in the mold, the bladder is placed instead of the vacuum bags. Once the mold is closed, the bladder is pressurized to compact the composite within the mold.
Design of the Mold
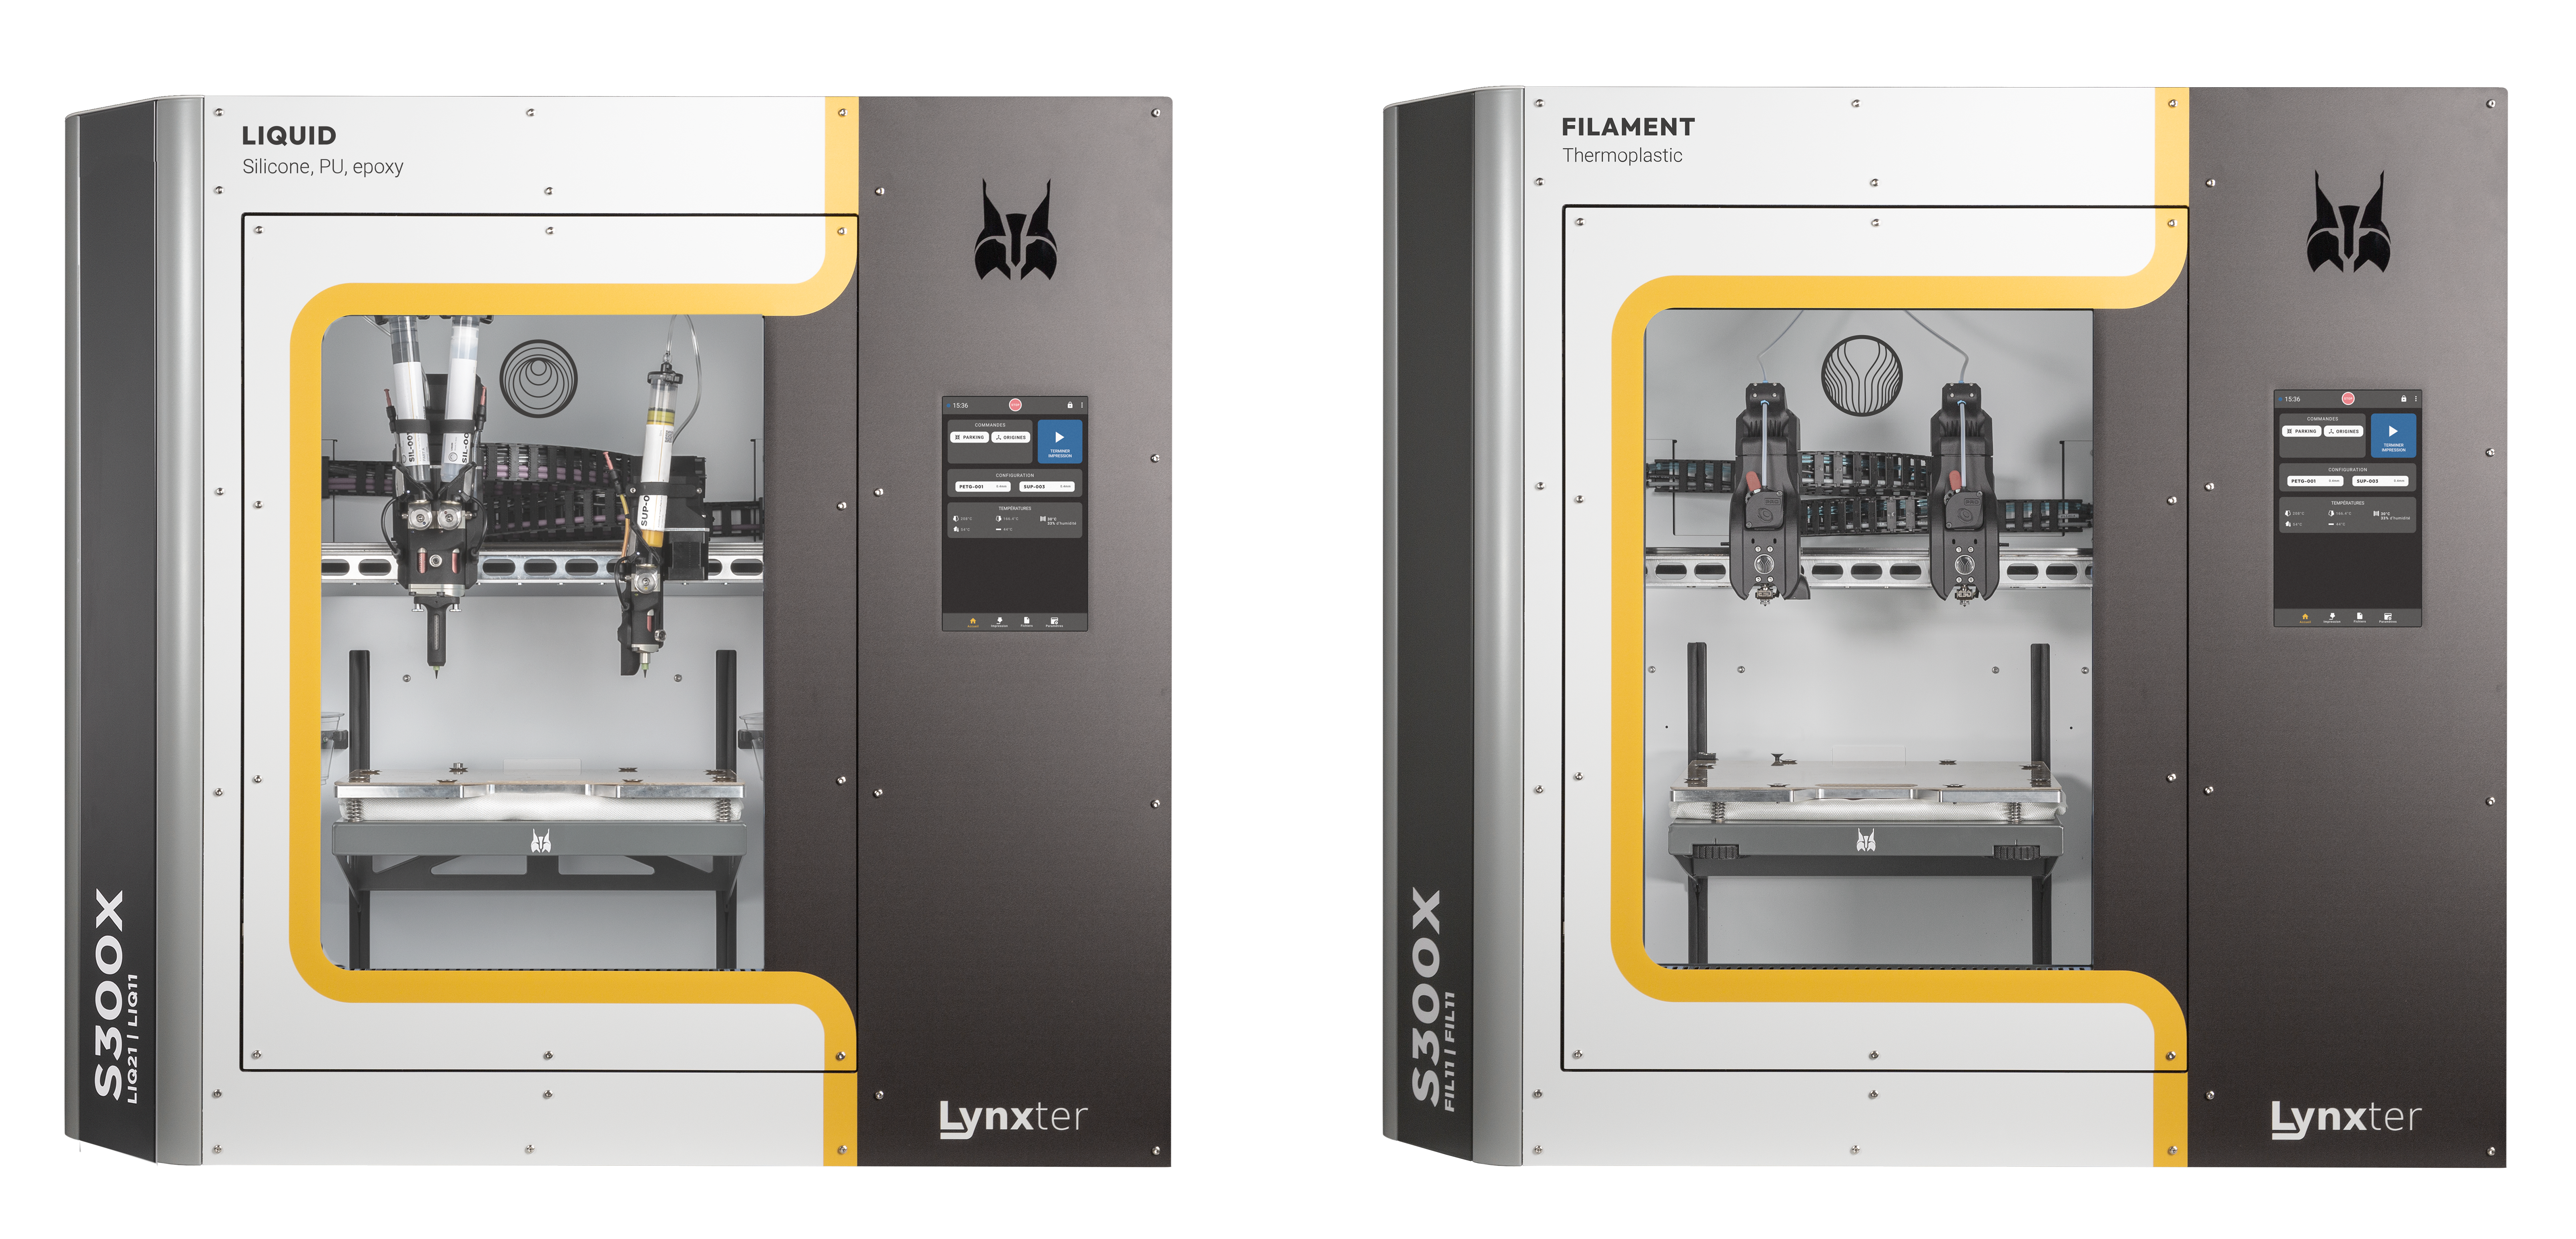
To manufacture the final part, the first step is to design the mold. To do this, the 3D printer S300X – FIL11 | FIL11 proved useful. Indeed, this IDEX filament 3D printer can print two symmetrical parts simultaneously. Therefore, printing the mold took half the time. The material chosen was PC (polycarbonate), a material with high resistance to stress and deformation.
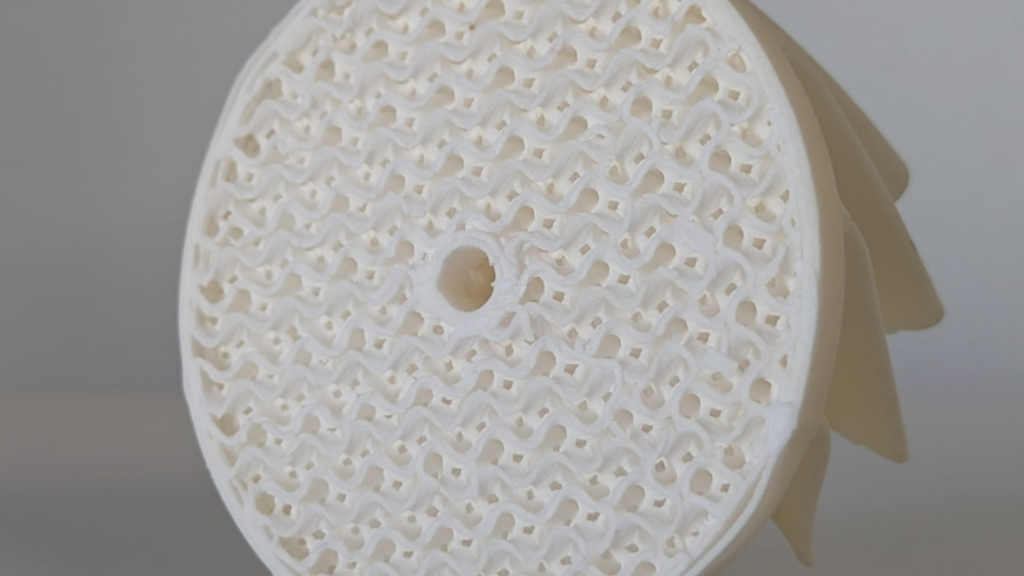
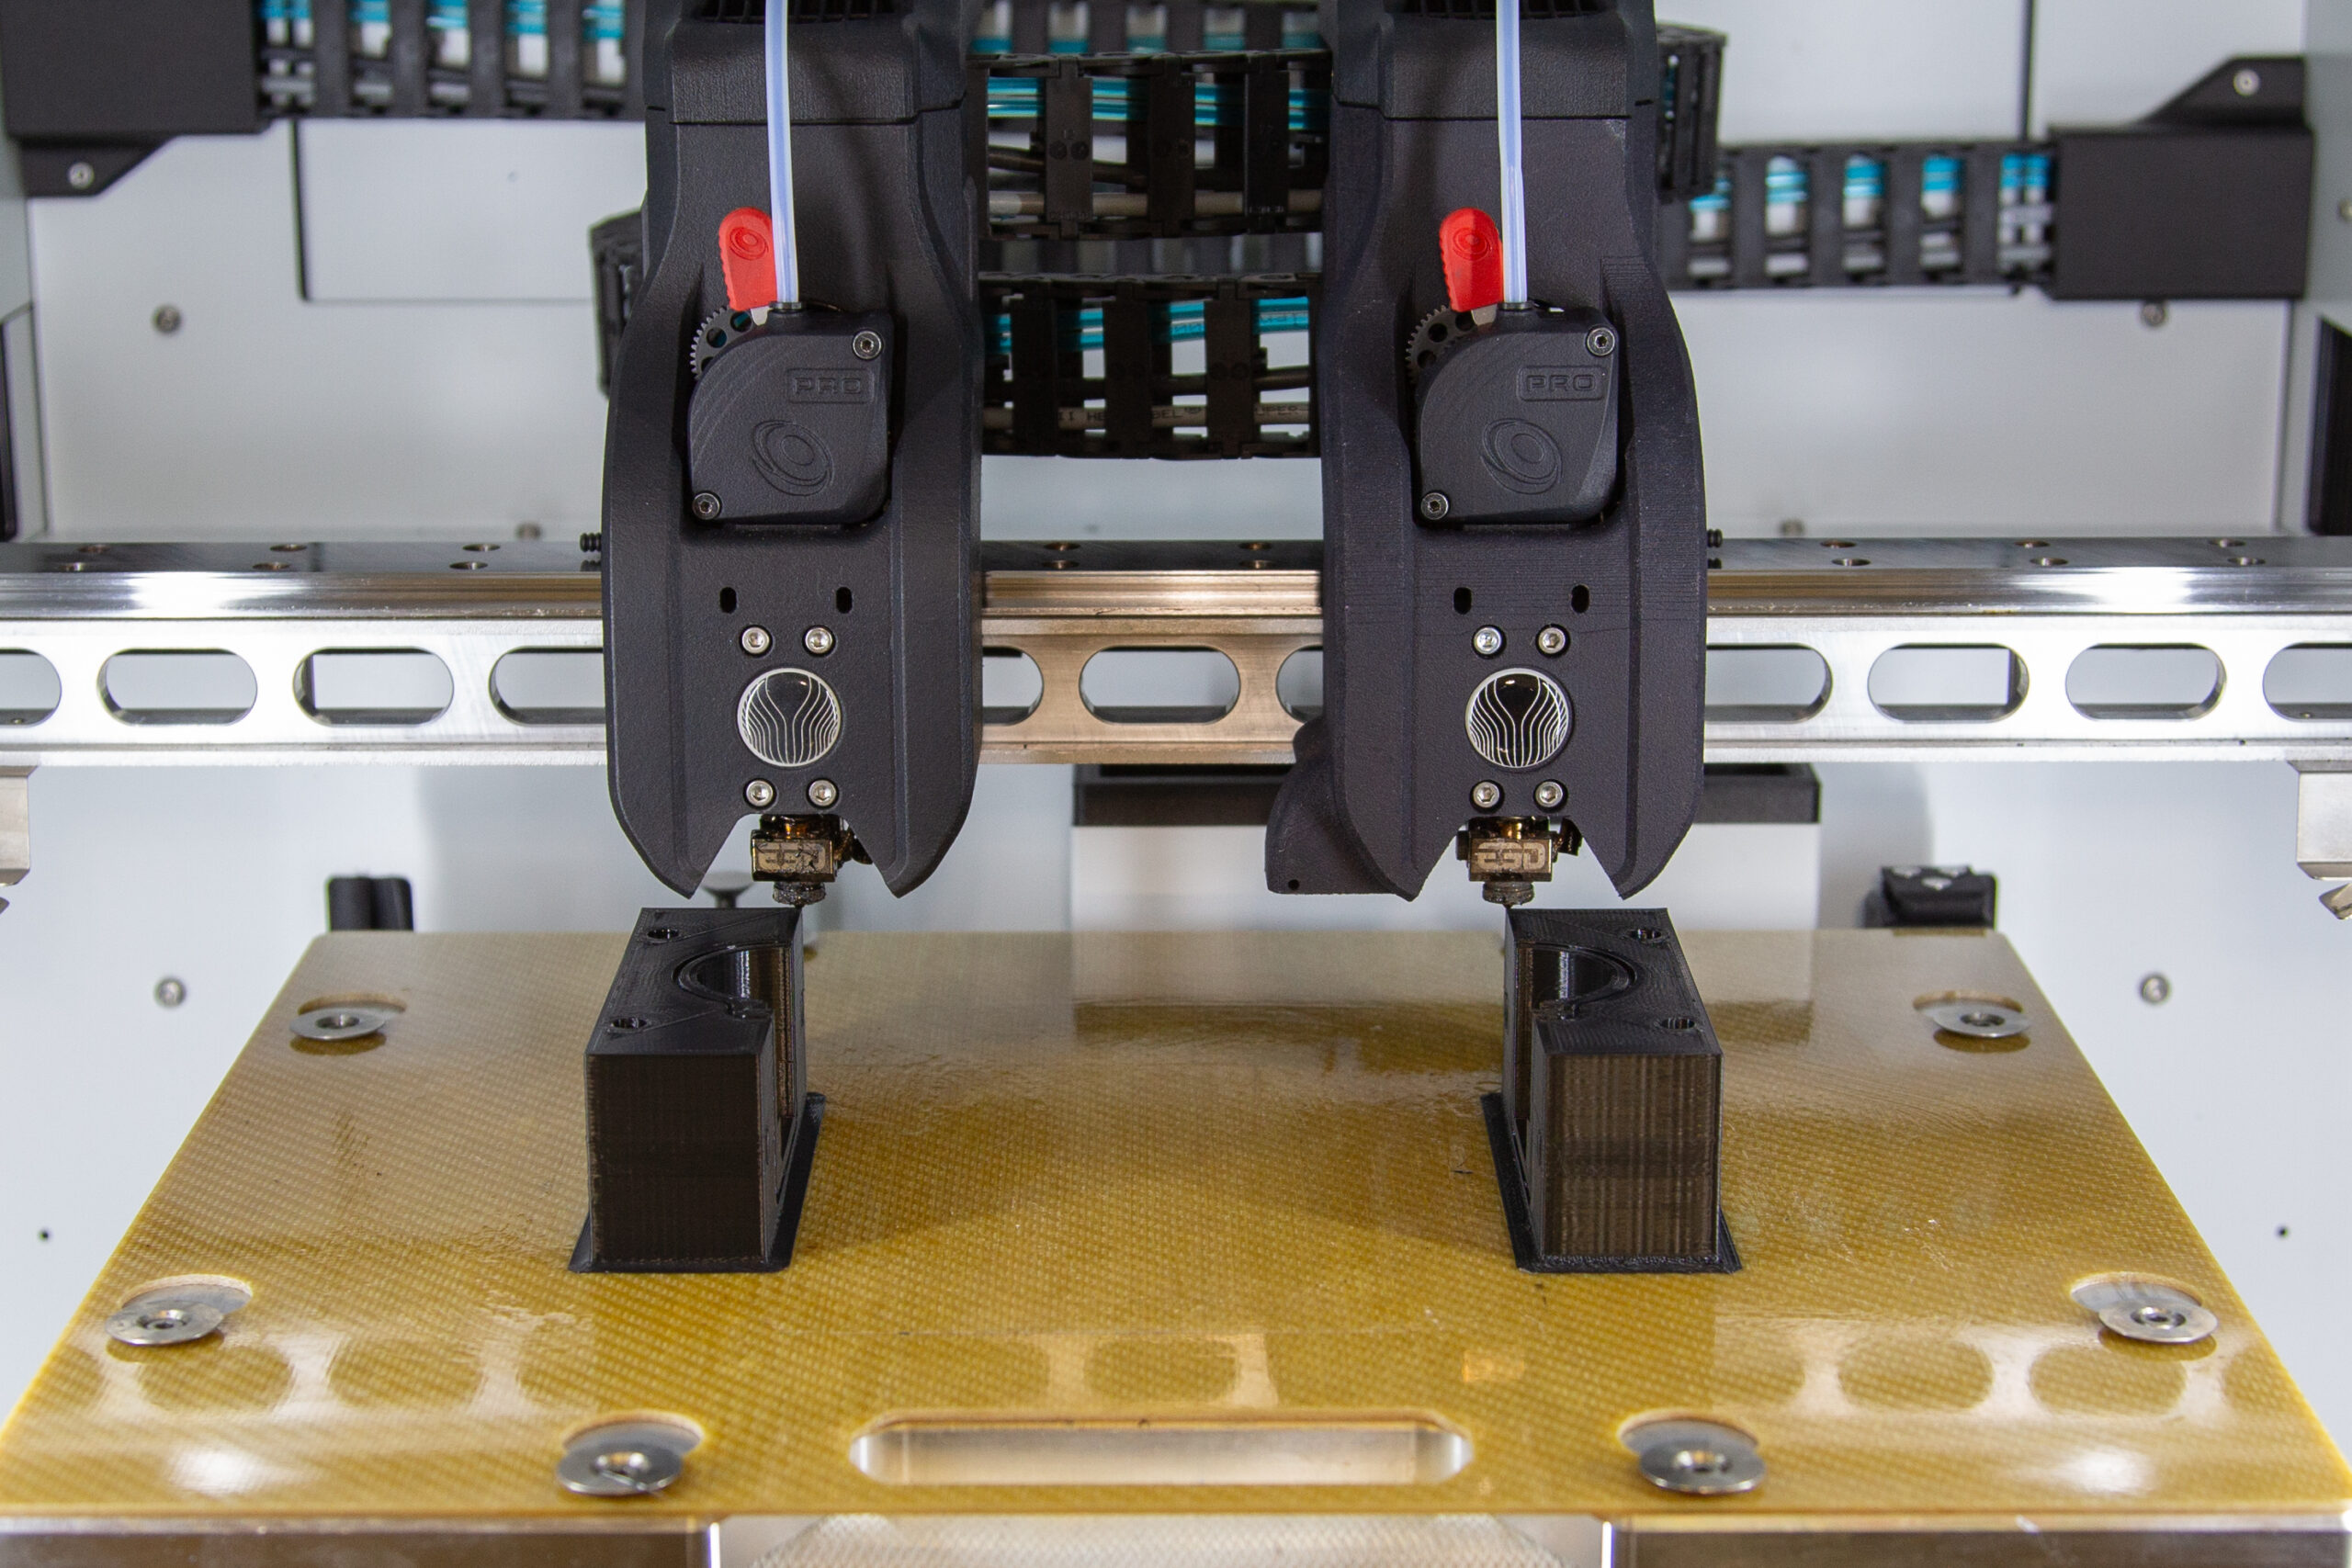 3D printing of the polycarbonate mold
3D Printing of the Silicone Bladder
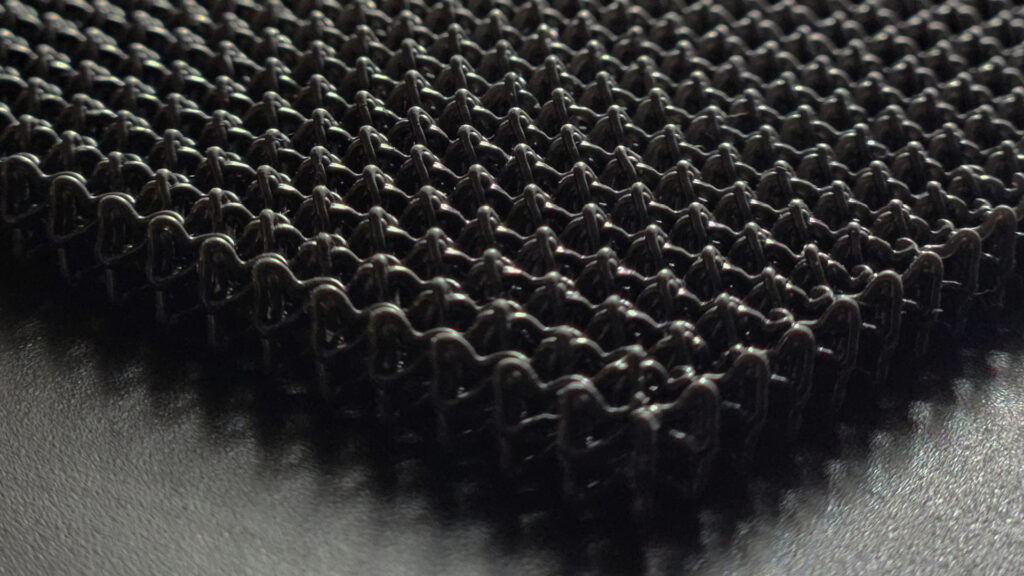
Enzo then printed the silicone bladder using the 3D elastomer printer S300X – LIQ21 | LIQ11, which allows for isotropic printing, meaning the same mechanical properties in all directions. Its soluble support printing technology makes it easy to print parts with internal cavities. The bladder is printed in COP1050, a very flexible silicone (10 shA), resistant to high temperatures, allowing the composite materials to adhere well to all the mold’s surfaces, even the hardest-to-reach areas. Additionally, this silicone ensures easy demolding and simplifies the removal of the part. Once the part is printed, it’s simply a matter of removing the soluble support for the part to be ready for use.
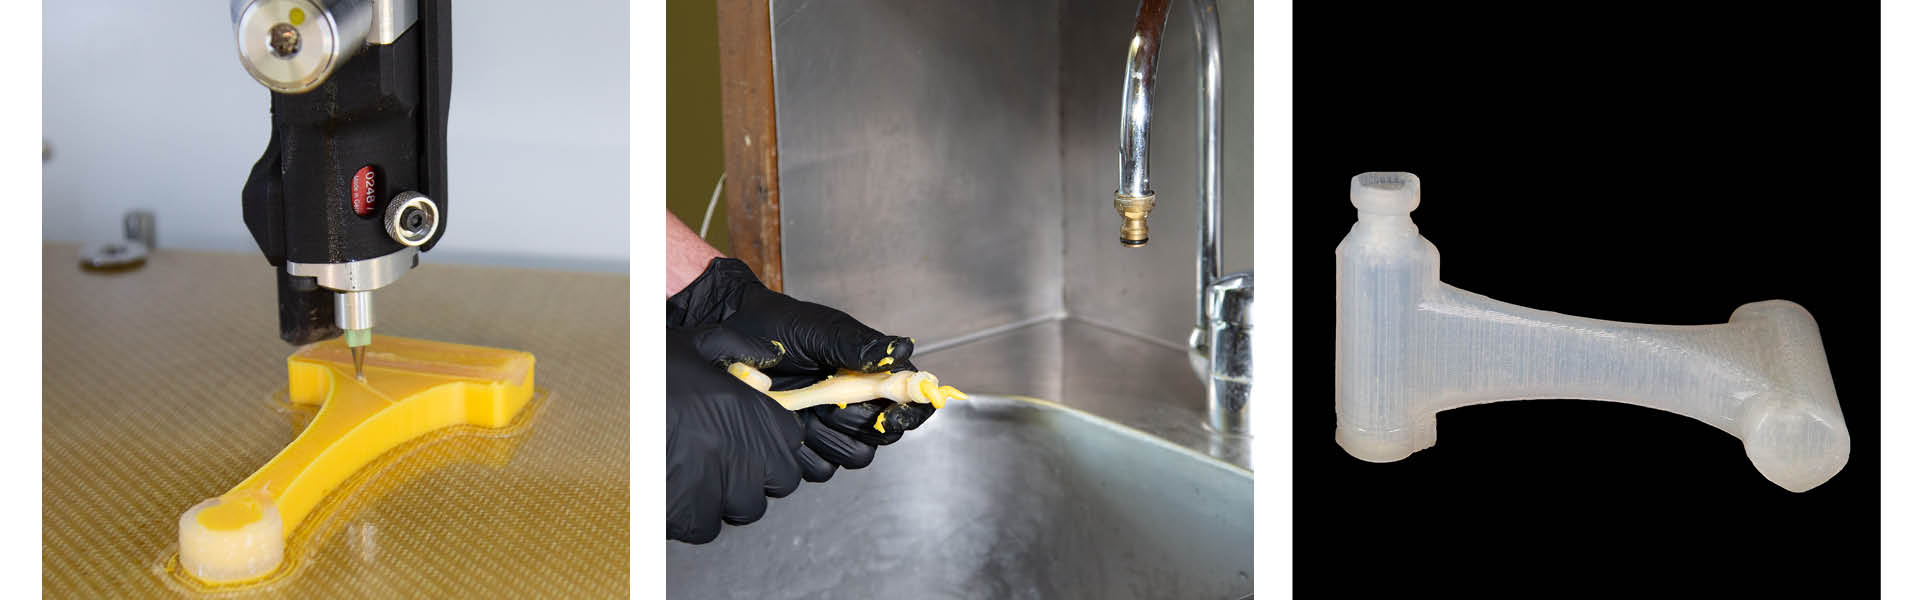 3D printing of the silicone bladder – Removing the soluble support – Silicone bladder
Creation of the Final Part: Carbon Fiber Bike Frame
Once the mold and bladder were printed, Enzo moved on to draping the carbon fiber part.
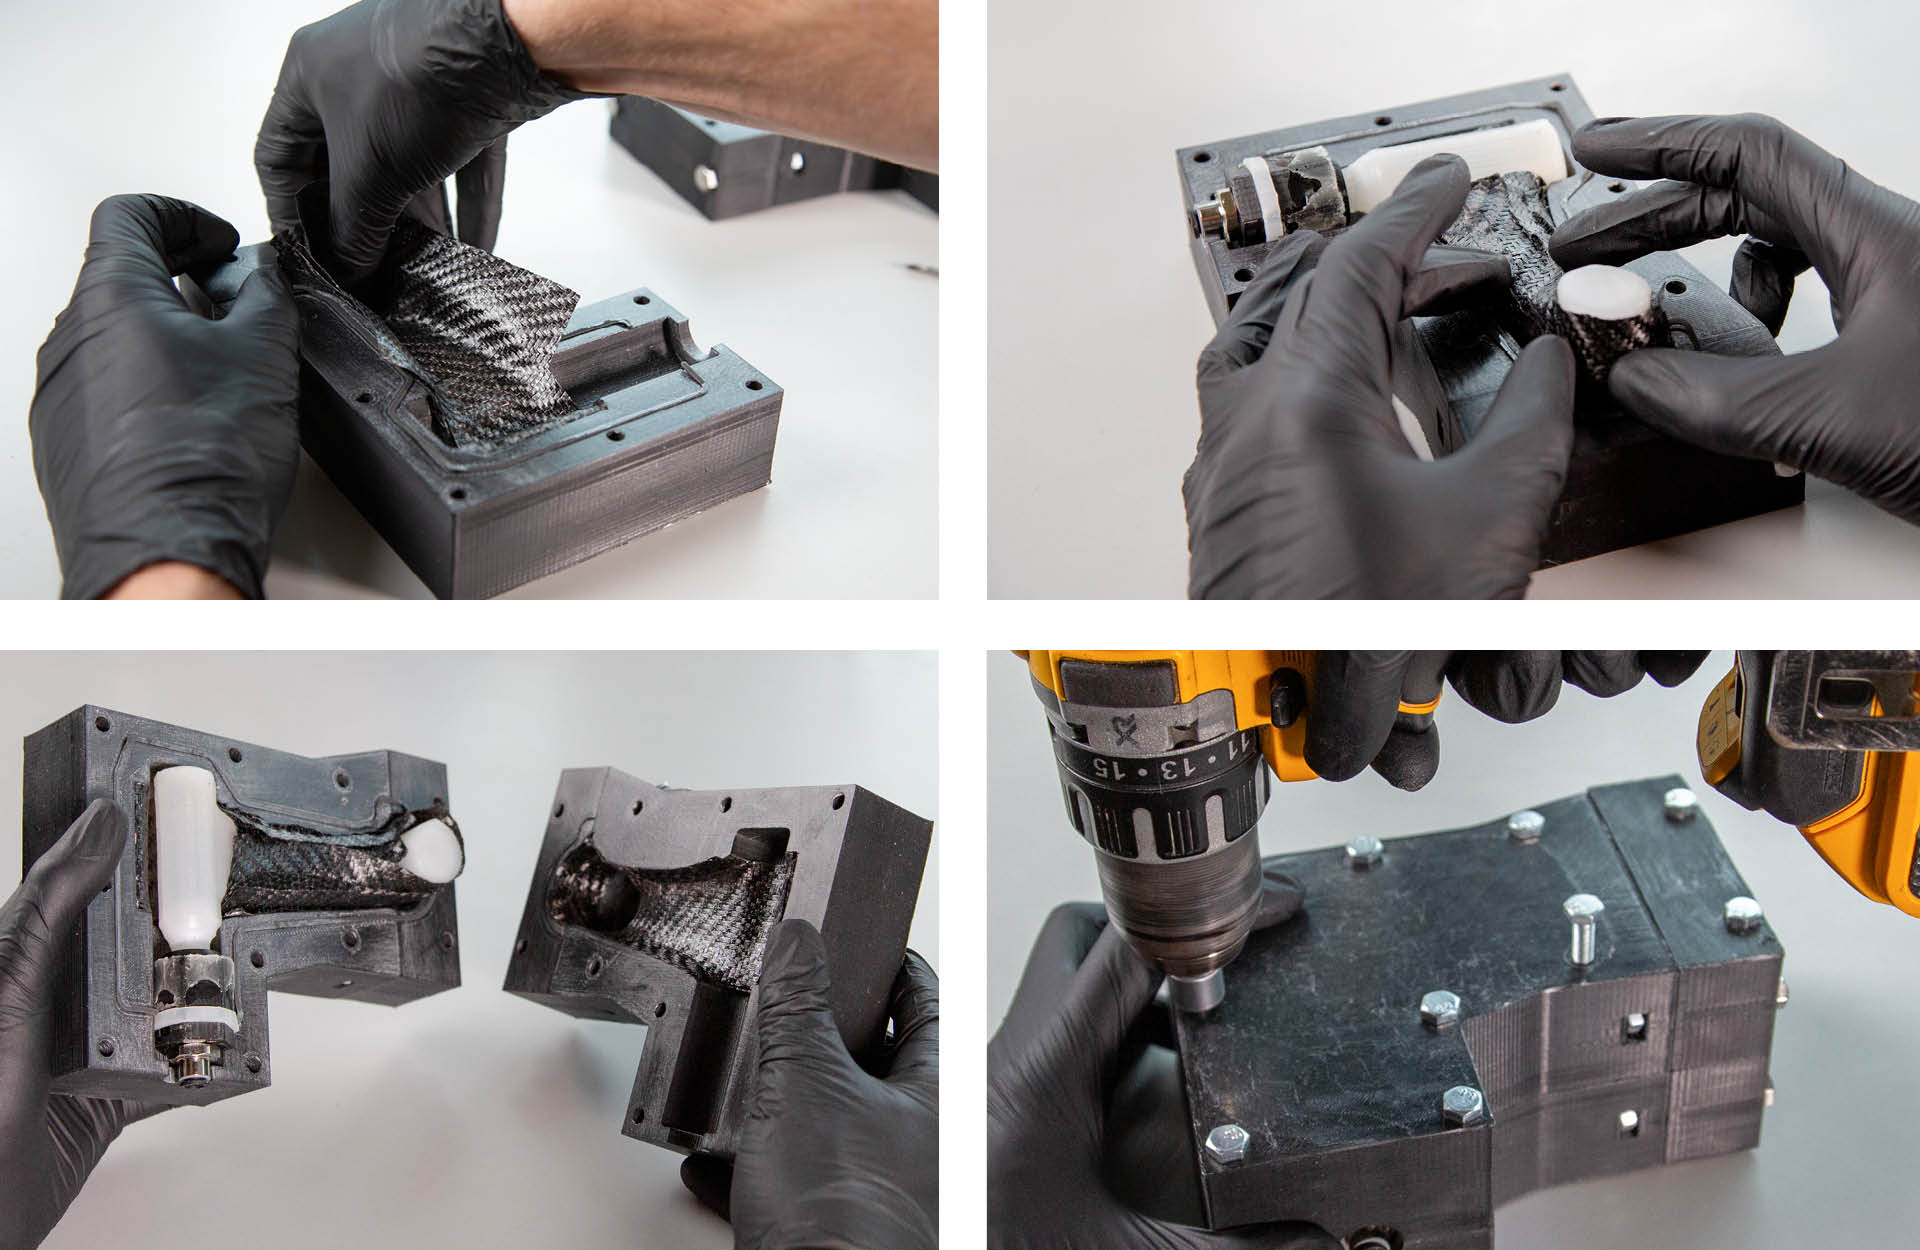
The first step is to place the carbon fibers in the mold along the walls. The second step is to place the bladder in the mold. When everything is sealed, the bladder is pressurized to compact the composite in the mold.
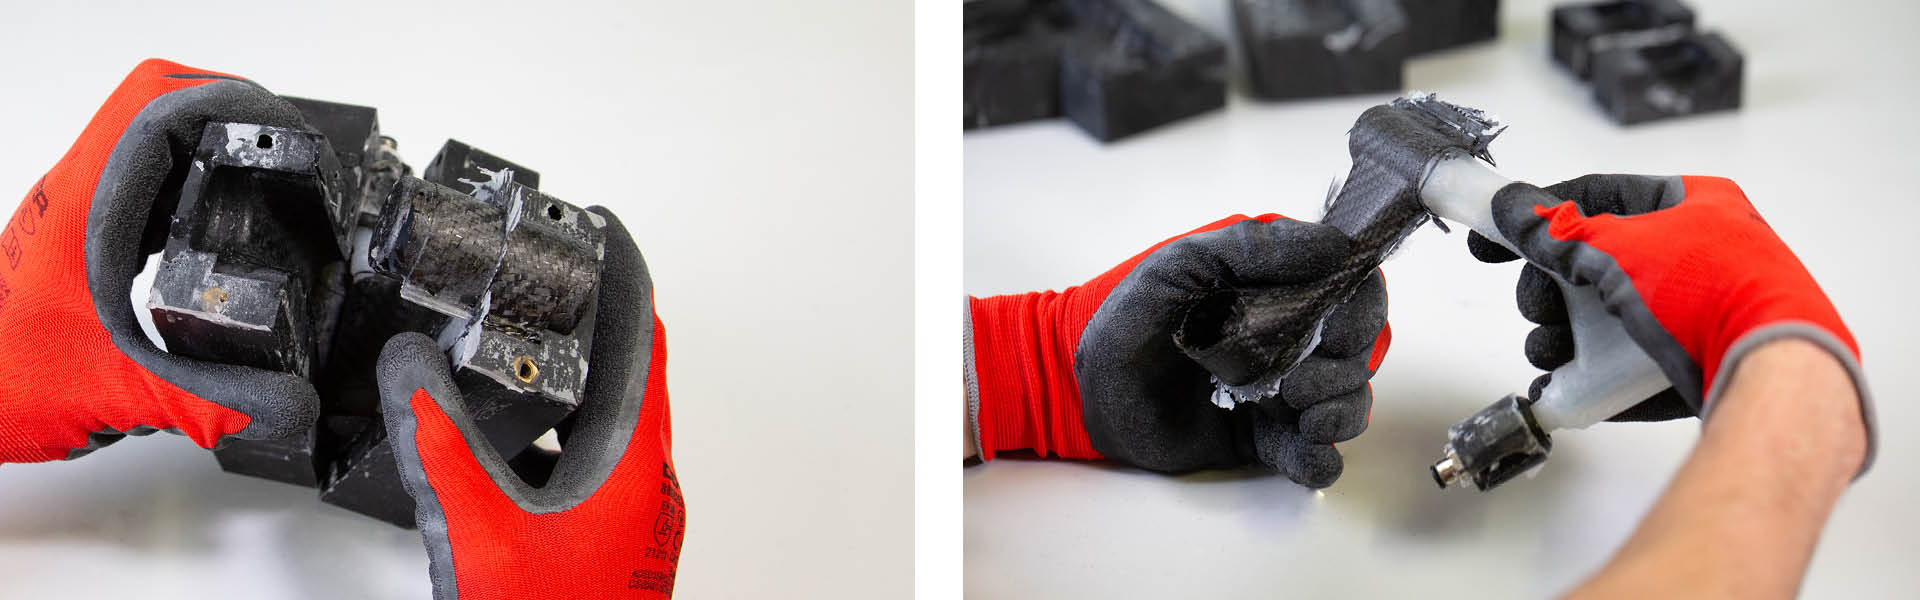
The part is demolded, then the bladder is removed. There is a slight finishing work done on the part before its final use.
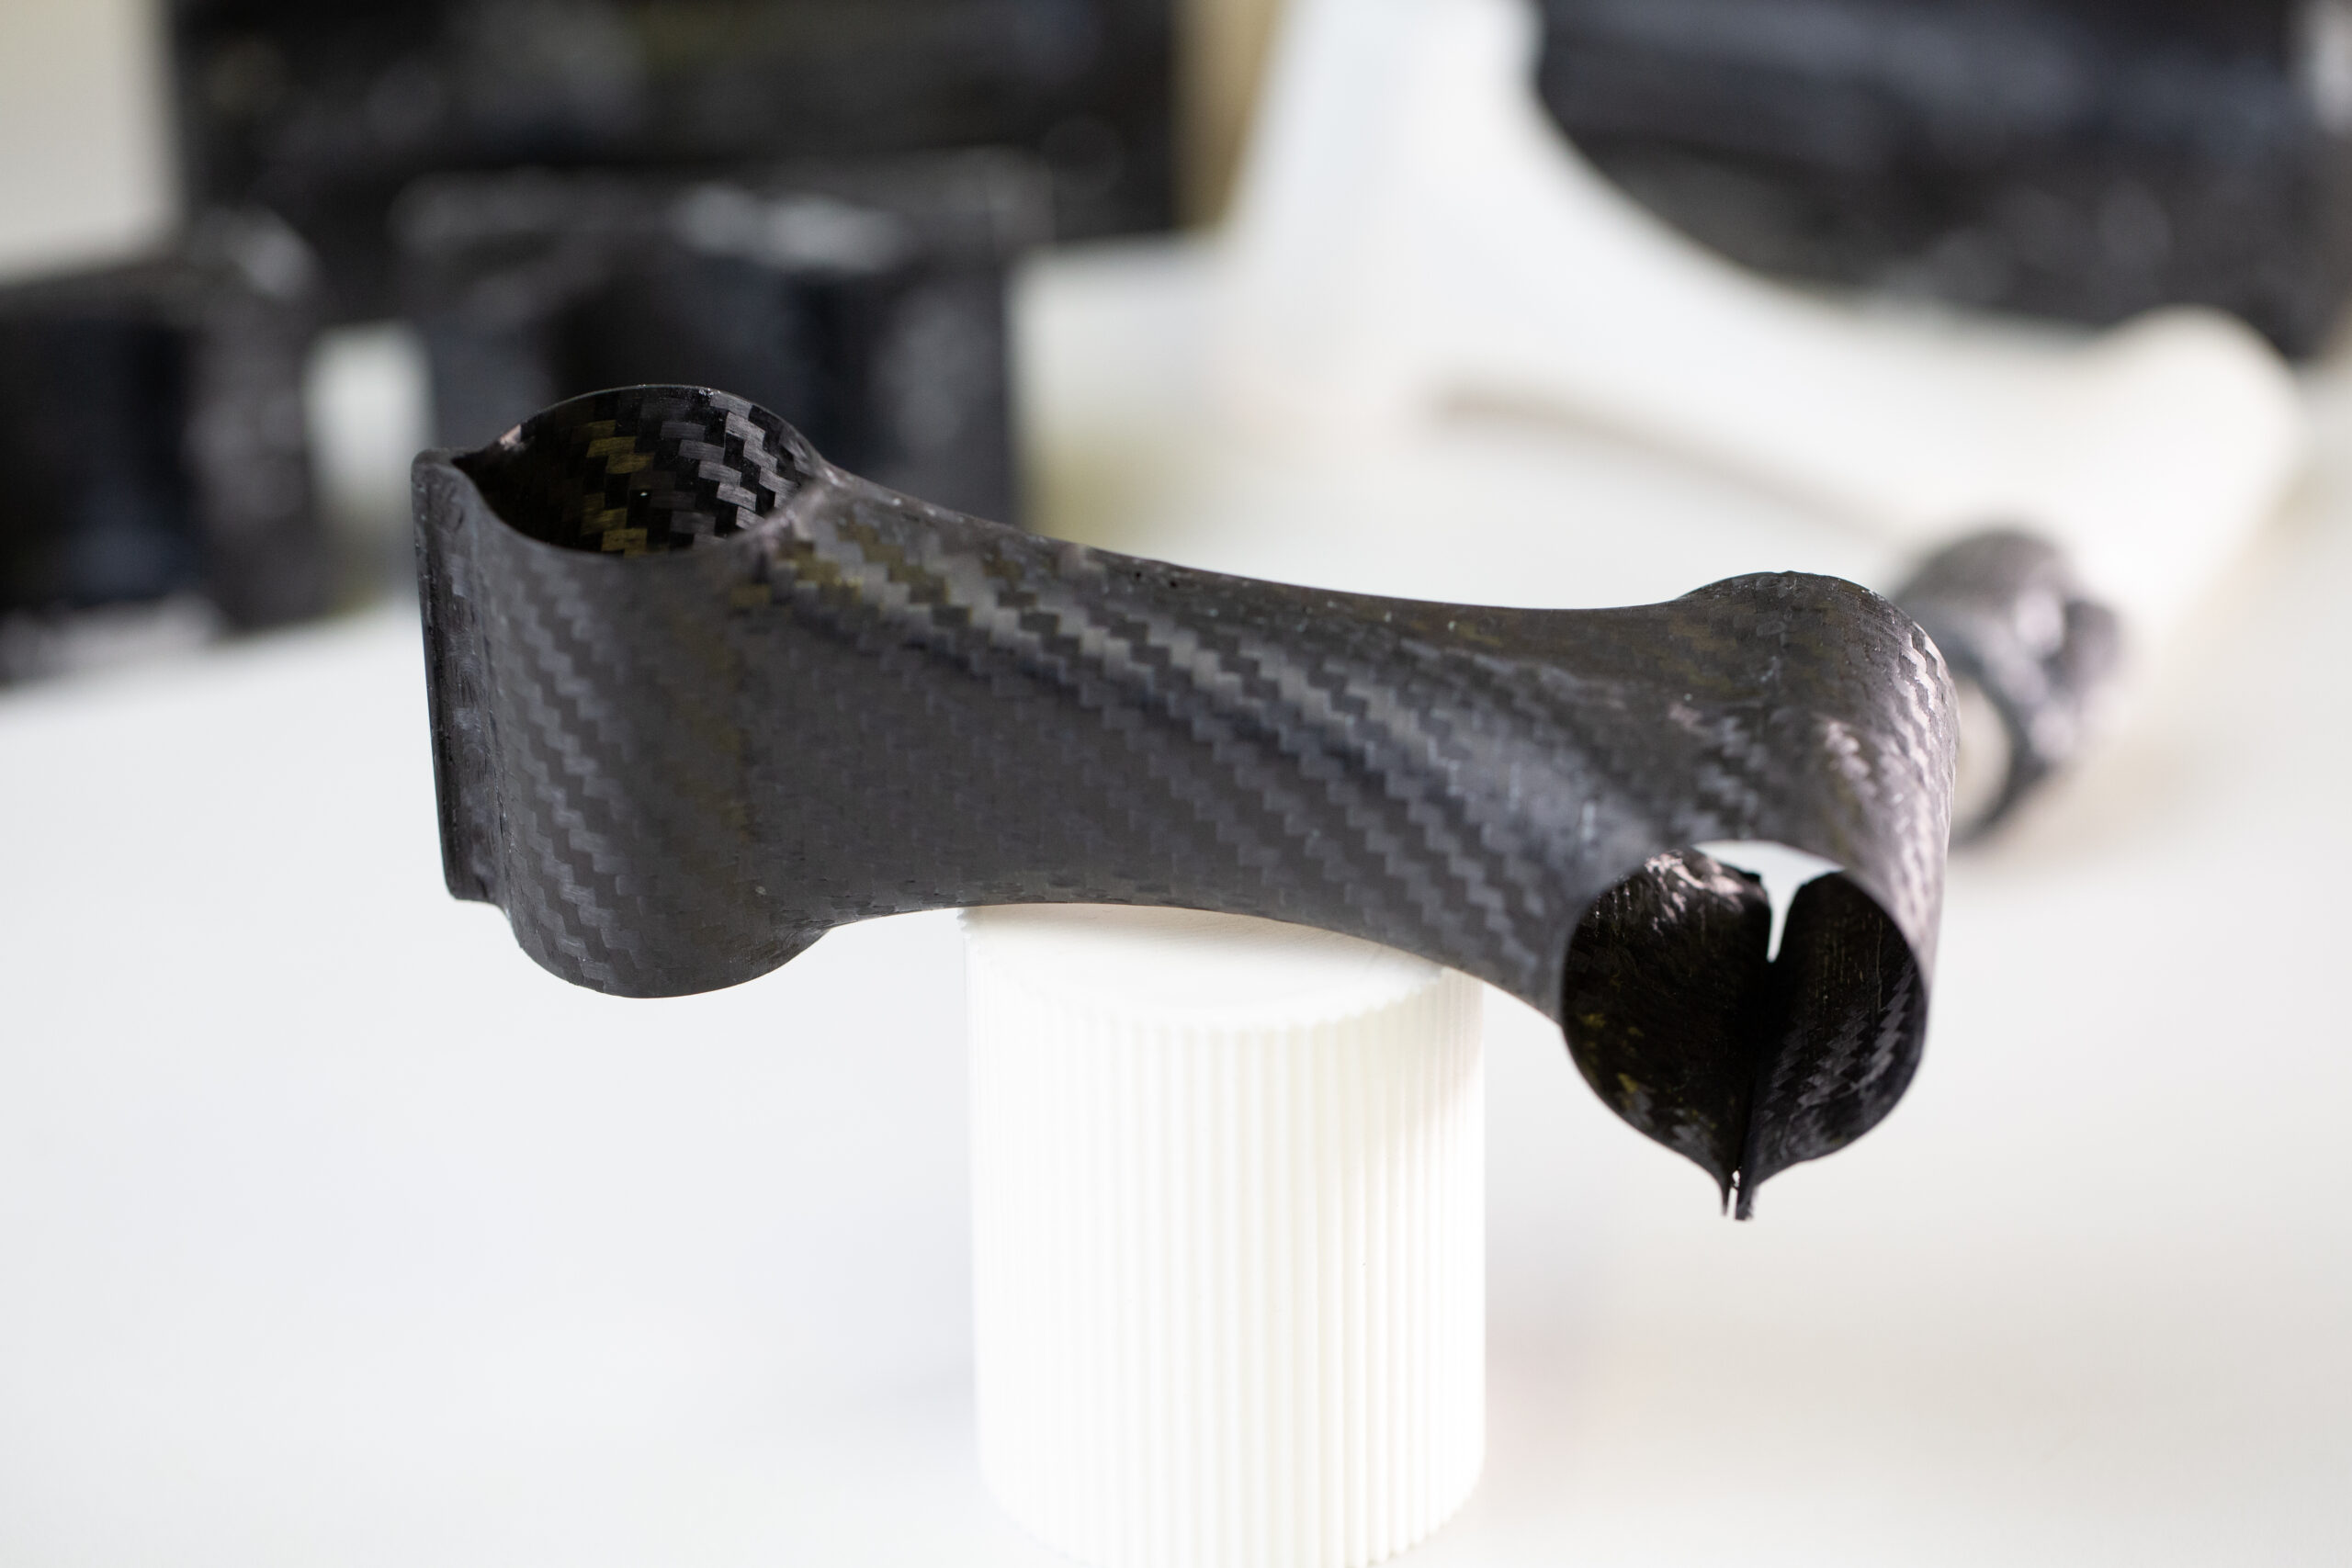
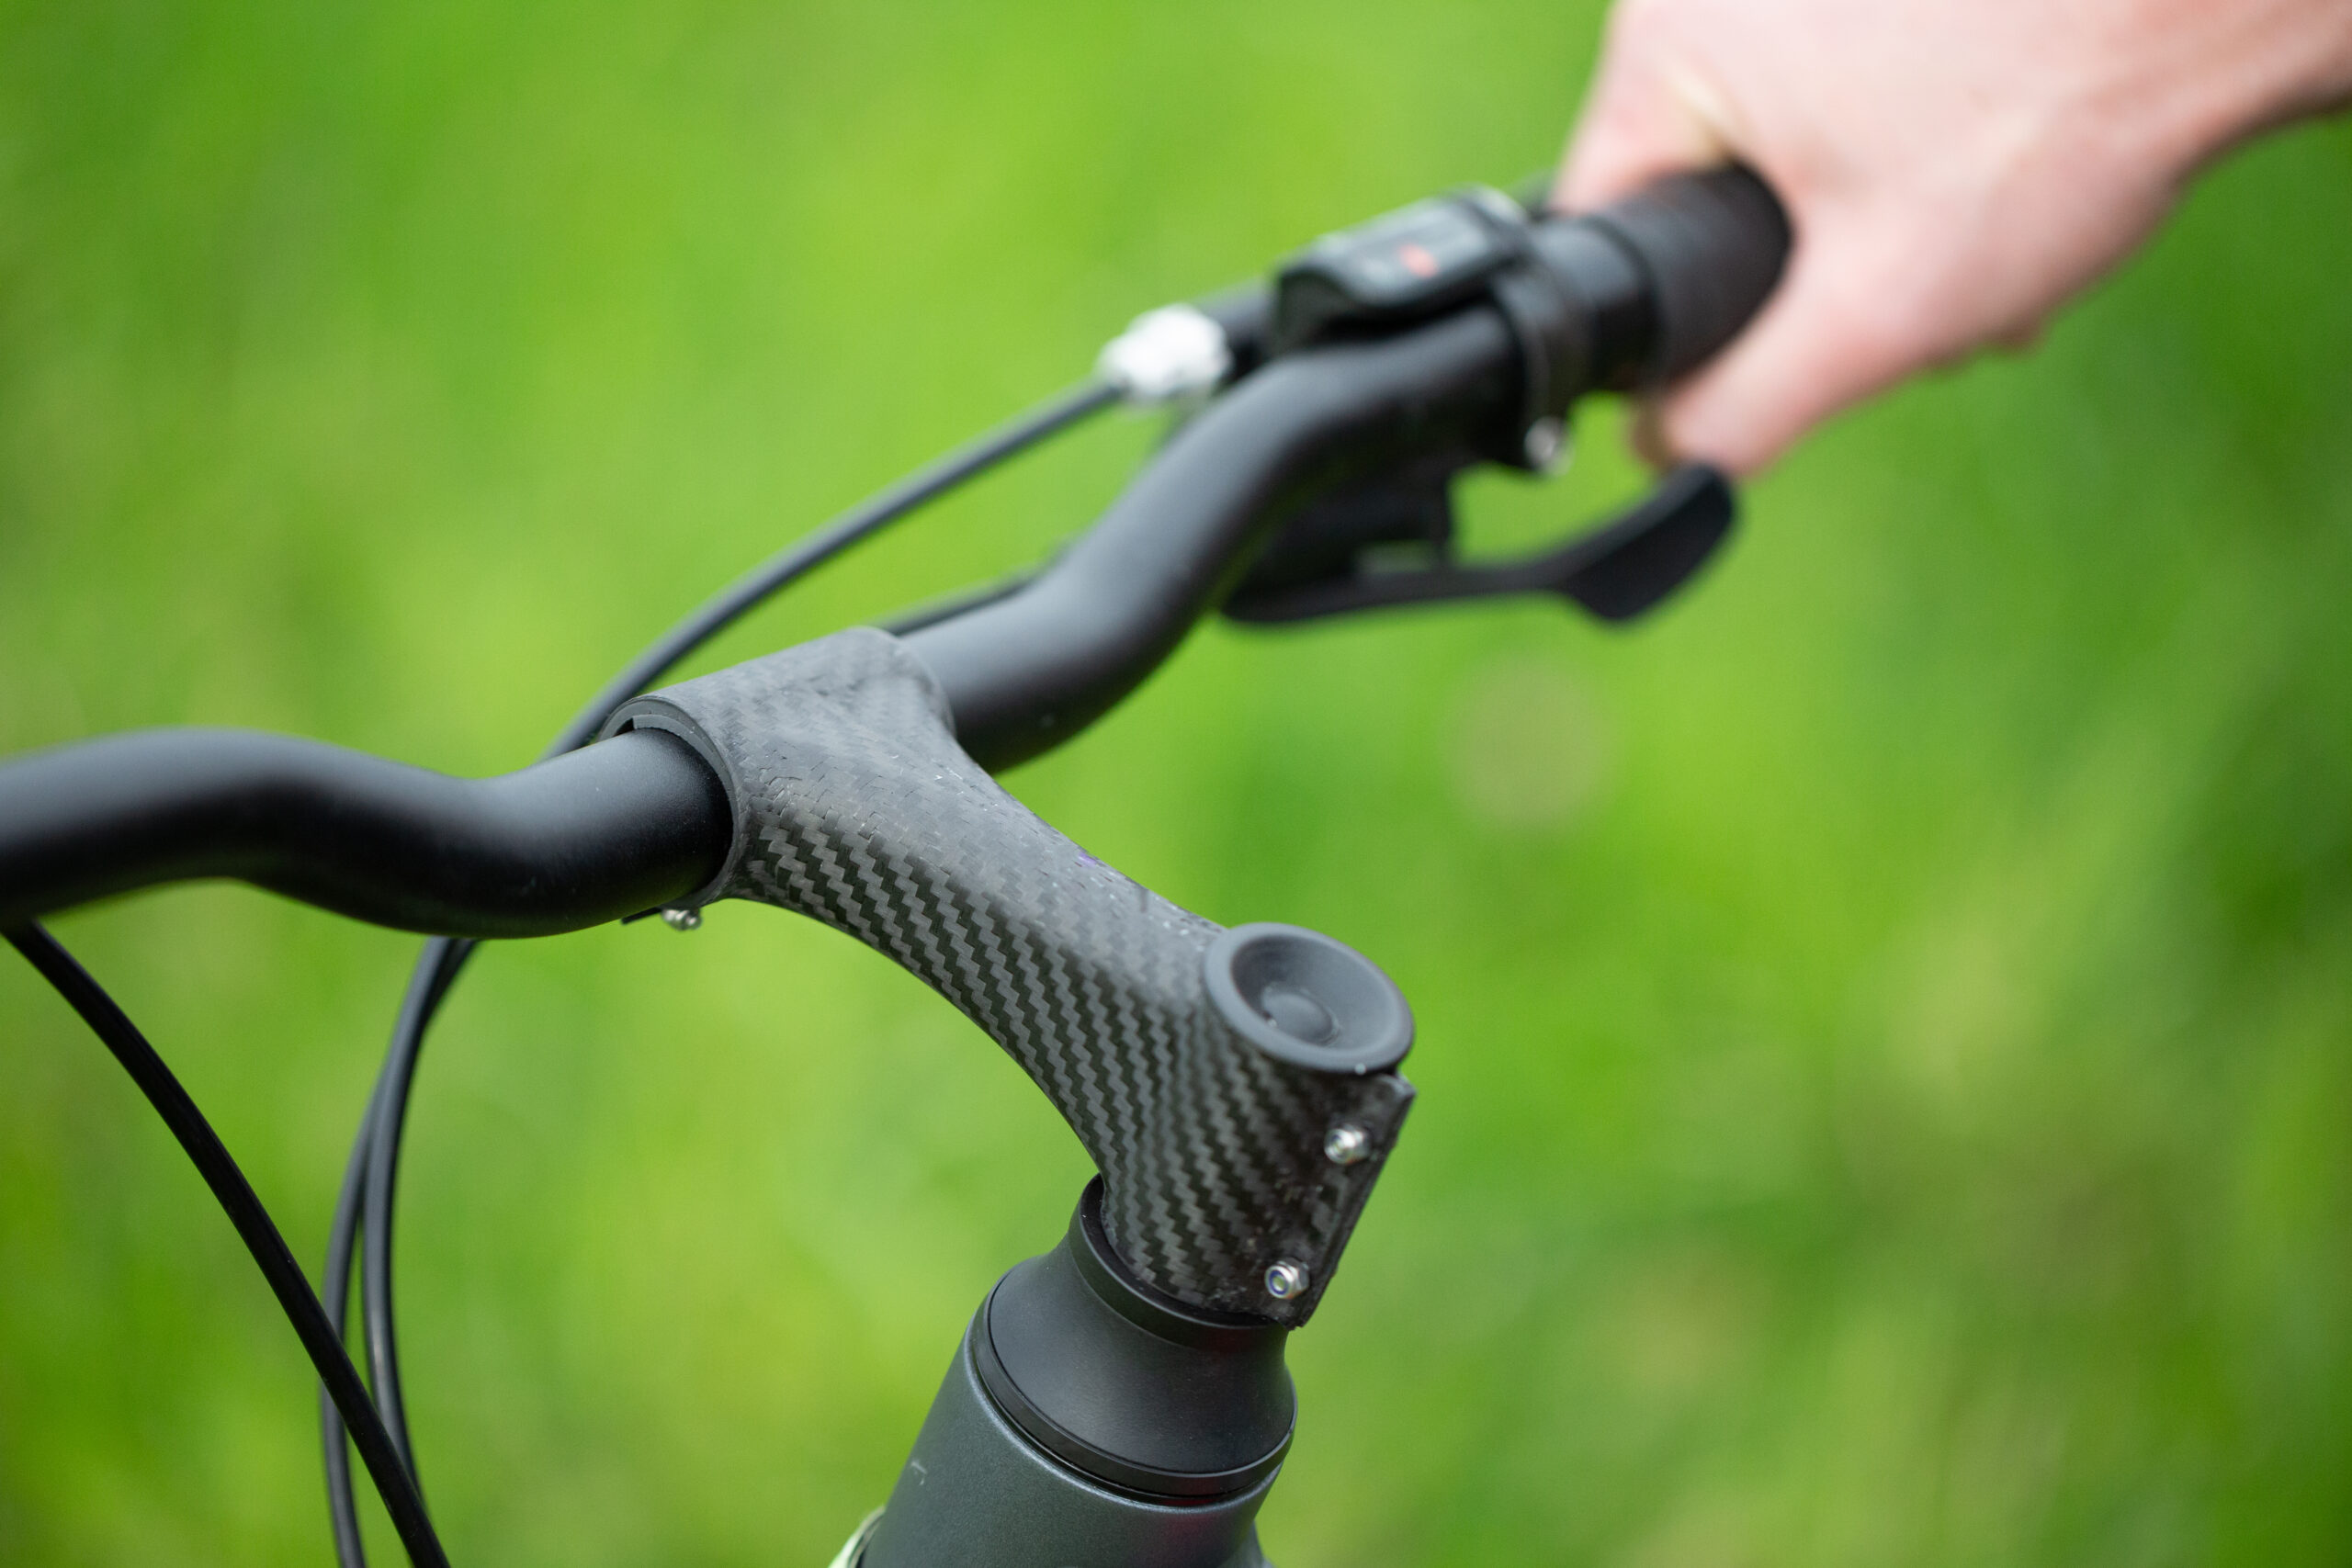 Final part, carbon fiber bike handlebar stem
In conclusion, the use of the two specialized 3D printers allowed the project to be successfully completed, and this without any difficulties. Indeed, the S300X – FIL11 | FIL11, a fast, dual-extrusion filament 3D printer, and the S300X – LIQ21 | LIQ11, the leading silicone 3D printer in its market, are two complementary machines for all types of prototyping projects, part replacements, tooling, and many other innovative projects. Learn more here.
| Parameters | Value |
|---|---|
| Printing time | 4h30 |
| Nozzle size | 0.69 mm |
| Layer height | 0.35 mm |
| Material cost | 36 $ |

| Parameters | Value |
|---|---|
| Printing time | 10h x 2 |
| Nozzle size | 0.40 mm |
| Layer height | 0.20 mm |
| Material cost | 19$ x 2 |
Enjoy our bundle offer:
Both 3D printers S300X – LIQ21 | LIQ11 and S300X – FIL11 | FIL11from €56 600 excl. tax (Europe), also benefit from our Fleet pack service offer (find out more).